> ## Documentation Index
> Fetch the complete documentation index at: https://docs.fill3d.ai/llms.txt
> Use this file to discover all available pages before exploring further.
# Virtually Staging Images
> Virtual staging with only a prompt.
Virtual staging significantly improves the conversion rate of properties, but remains an incredibly time-consuming
process. And quicker AI staging tools provide almost no control over the objects that are placed, while suffering
from visible, often unpleasant artifacts.
Fill 3D can virtually stage and render a room in just **2-3 minutes**.
## Staging an Image
Upload an image of an empty room, specify a staging prompt, select the
`stager-1-preview` model, then stage the image:
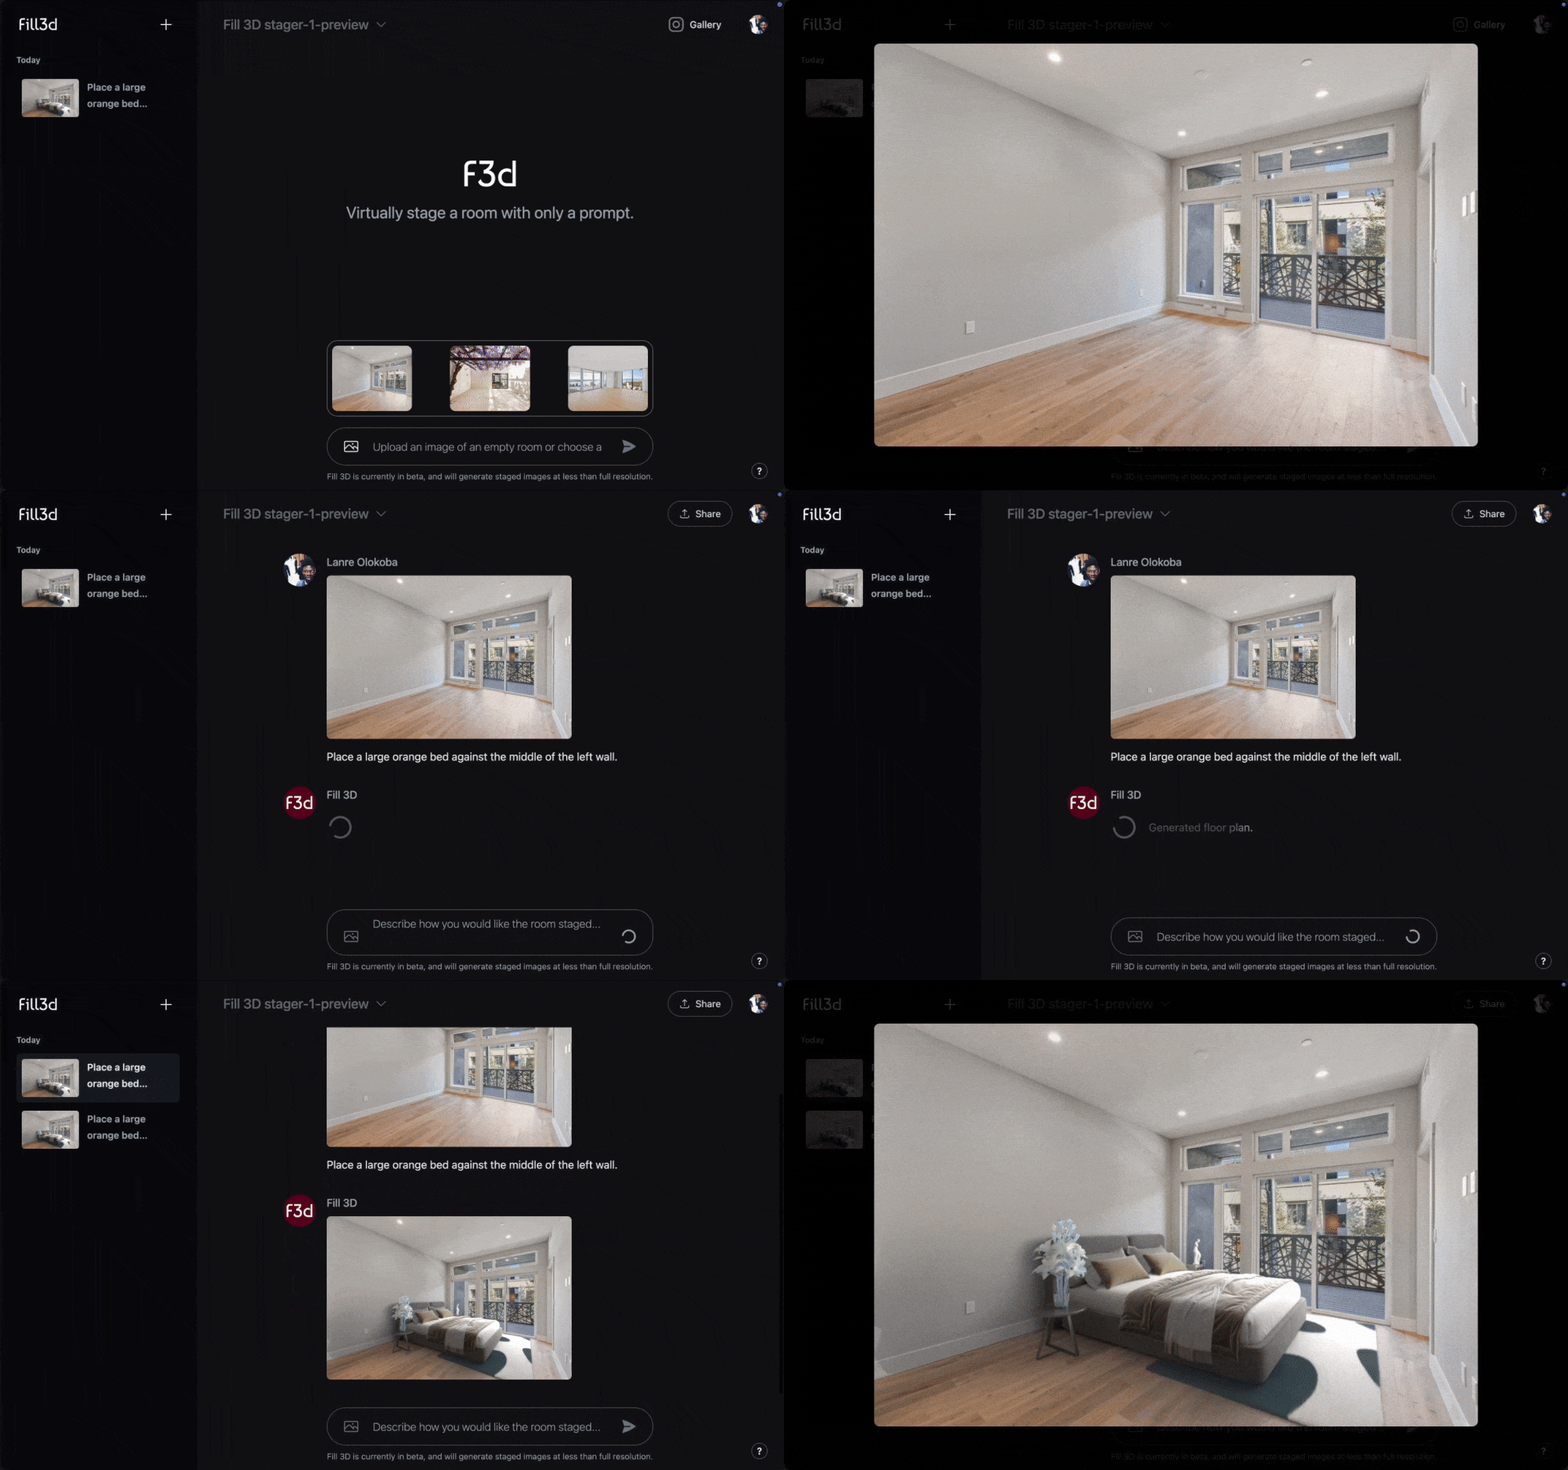
To ensure the best staging results, make sure that your image meets [these requirements](/workflows/3d#ensuring-the-best-results).
## Sharing the Staged Image
You can share the staged image along with the full prompt history with your team members or customers,
for provenance or marketing reasons. Use the 'Share' button to generate a shareable link:
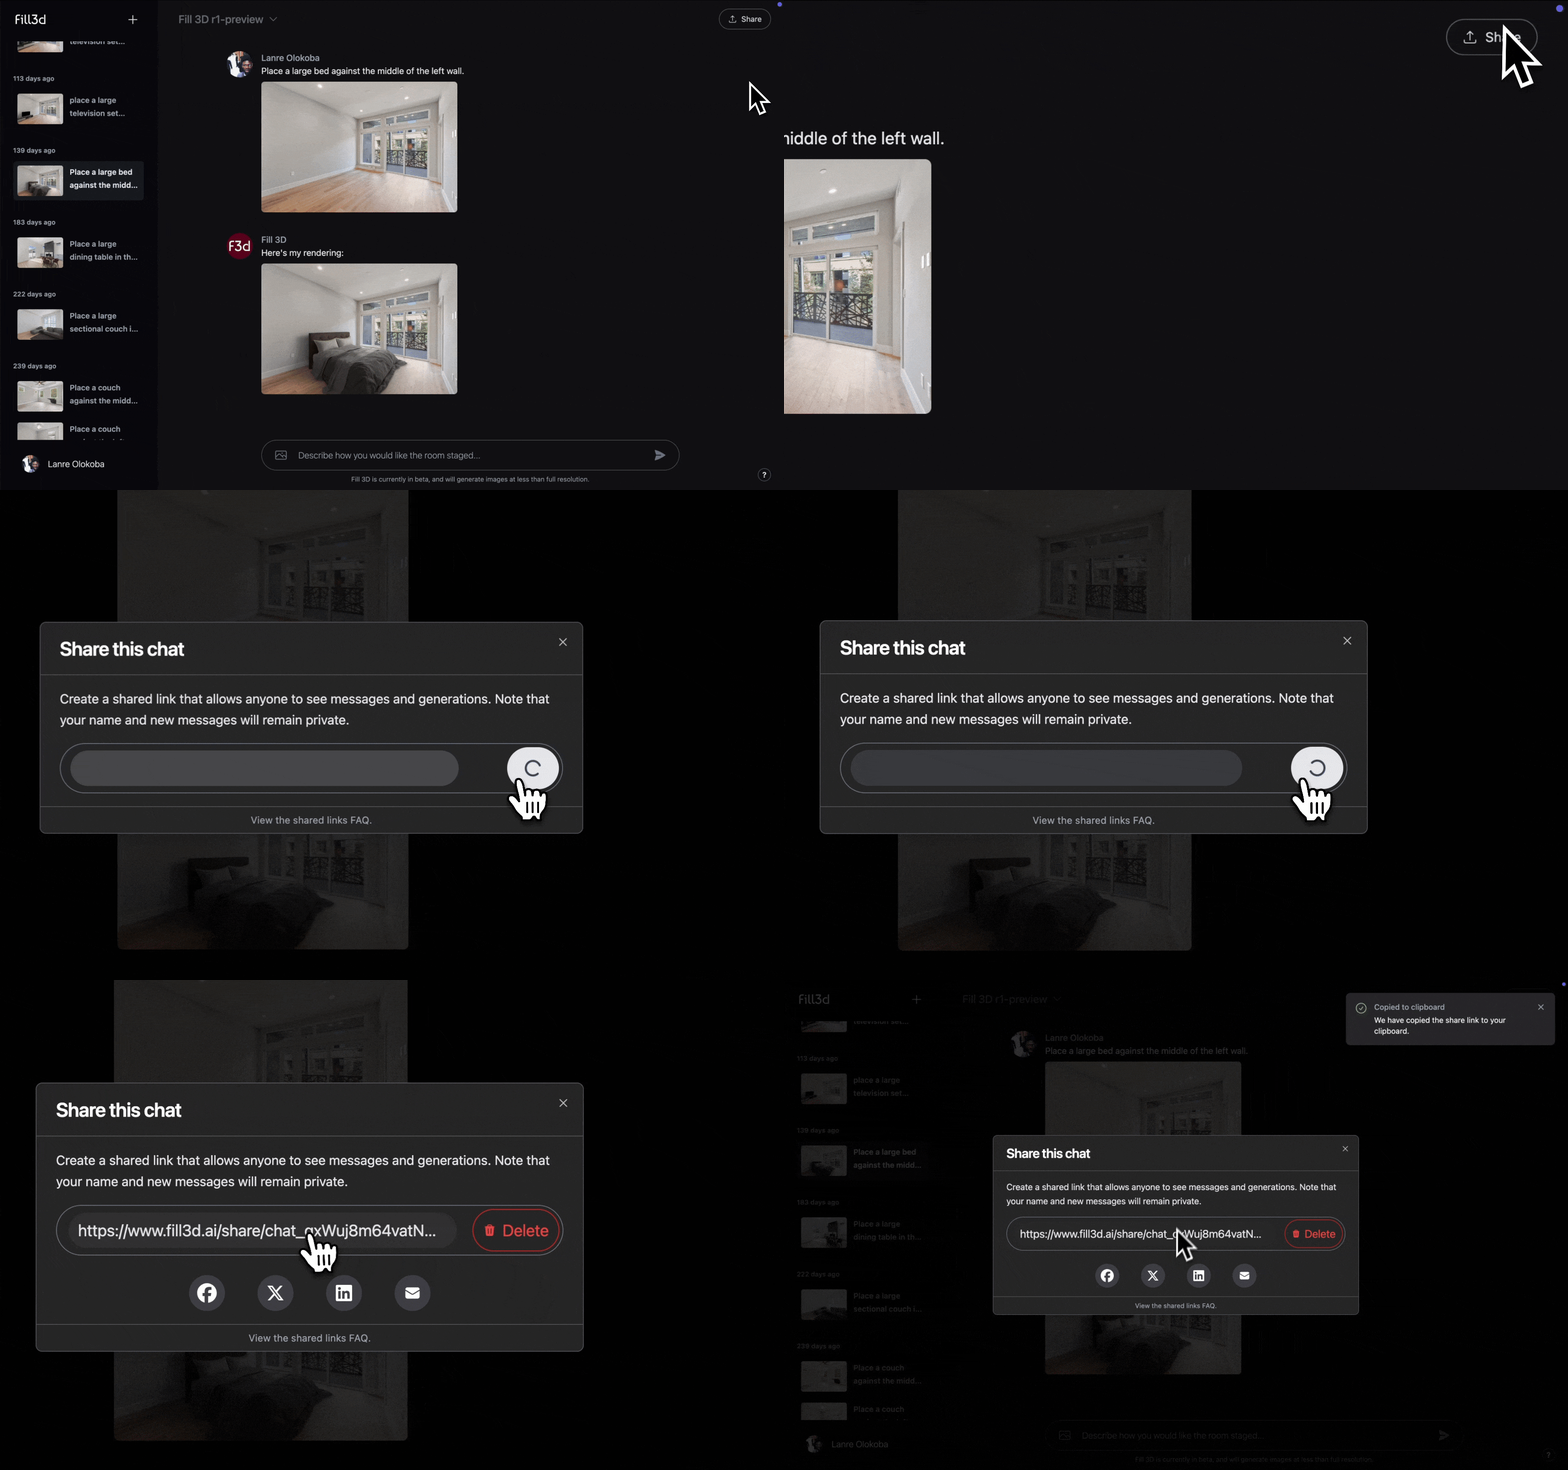
The shared link will only contain messages from when the link was created. To show new messages after the
shared link is created, delete and recreate the shared link.
## Crafting an Effective Prompt
Our staging AI models are trained to place furniture items procedurally. This means that when you provide a
prompt, our staging model will create a set of **placements** that are then rendered. Below is the
recommended prompt structure for creating a placement:
Begin by describing the type of furniture you want placed. The model places **bundles** of furniture and
understands preferences like color, design, and so on:
```ts theme={null}
"Place a large bed with nightstands and an orange bed cover..."
```
Make sure to specify the location of the object in relation to walls, windows, or other notable features in the room:
```ts theme={null}
"against the center of the left wall, between the two windows..."
```
Describe how the object should be rotated using relational cues. Relational cues can include
walls, windows, other features in the room, and the camera.
```ts theme={null}
"with the bed rotated so that it is facing the opposing wall..."
```
If an object is placed against a wall, its orientation will be locked so that it is flush against the wall.
Specifying a scale is typically not necessary, as the model has a good understanding of relative scale. But
you can always specify the scale to meet your exact requirements:
```ts theme={null}
"and make sure it is large enough to fill much of the floor space."
```
Repeat the above steps for as many objects as you want placed in the scene.